
Virtual machines
This is the list of long-lived VMs and the templates you can stamp new ones from.
What this page is for
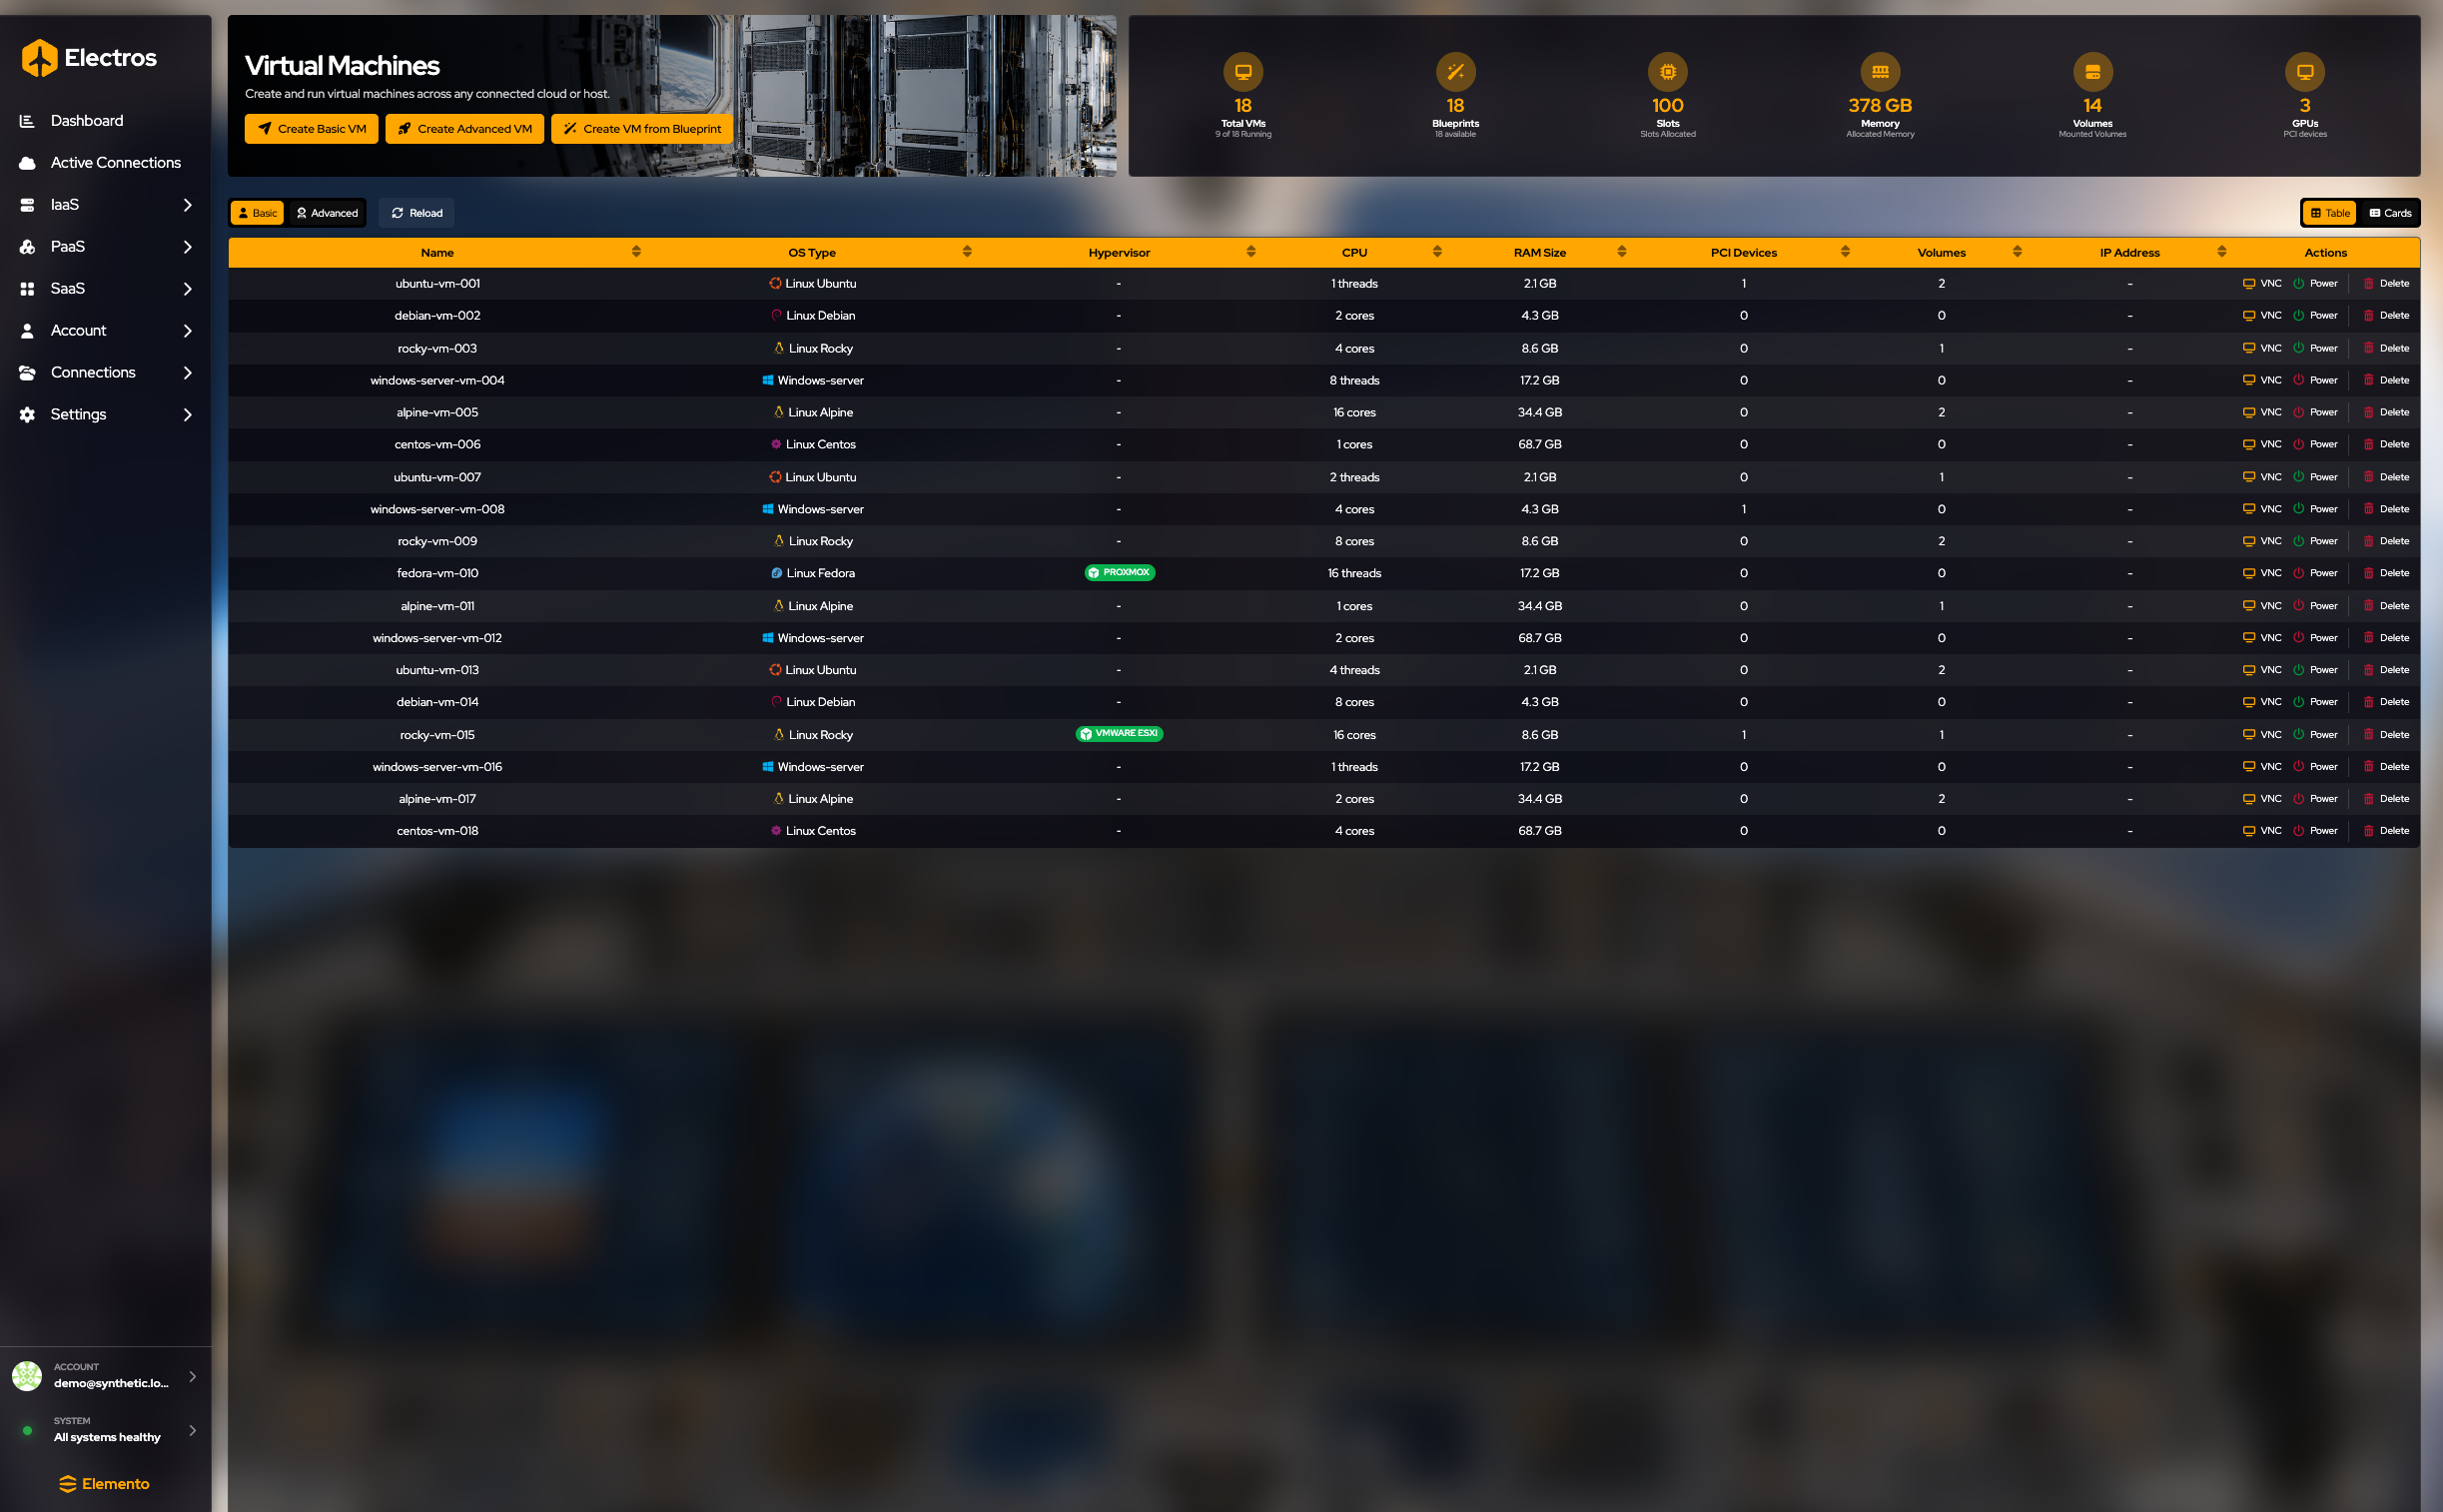
This is the inventory of guests you intend to keep: lab machines, servers, templates you stamp from. Power, console, disks, and deletion all start from the row. Creating a new guest starts from the three buttons under the title; the steps are in Create a VM below.
Read the page
The gauges count Total VMs, Blueprints, Slots, Memory, Volumes, and GPUs.
The table columns are Name, OS Type, Hypervisor, CPU, RAM Size, PCI Devices, Volumes, IP Address, and Actions. A green chip in Hypervisor is the host type (Proxmox, ESXi, and so on). A dash means Electros does not have a hypervisor label for that row.
Table is the compact list. Advanced opens the row into cards. Reload refreshes power state from the hosts. Table and Cards at the right switch the layout.
Create a VM
| Button | When to use it |
|---|---|
| Create Basic VM | Name, OS preset, CPU, memory, optional disks |
| Create Advanced VM | You also need networks, PCI, HA, EFI, or CPU flags |
| Create VM from Blueprint | Your organisation already defined sizes |
The OS preset does not install the guest. Attach a bootable volume or ISO if the machine still needs an installer. All three follow the shared creation pattern.
Basic VM
Where: Virtual Machines → Create Basic VM
1. Name the machine
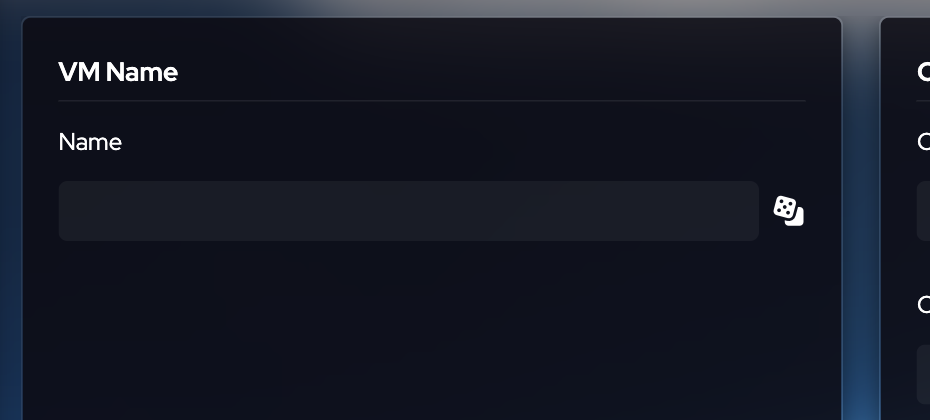
Type a name, or press the dice to generate one. You cannot continue with the name left blank.
2. Choose an operating-system preset
Pick an OS Family (for example Linux), then an OS Flavour (for example Ubuntu). Both are required. “Select an OS” is the empty state, not a valid choice.
3. Set CPU and memory
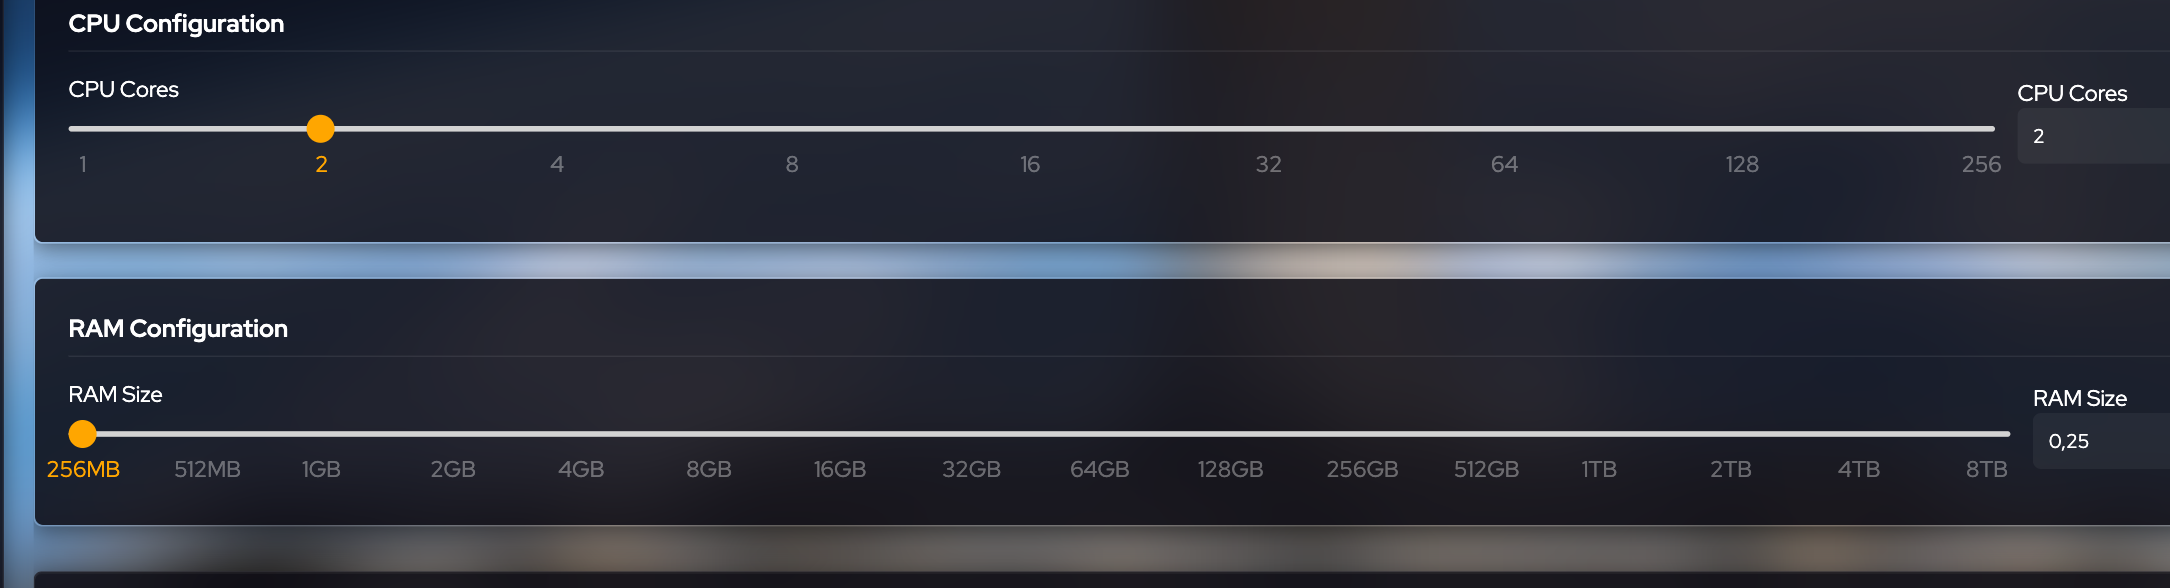
Drag the sliders or type a number. New VMs start at 2 CPU cores and 256 MB of RAM. Cores can go up to 256; memory up to 8 TB. The number on the right of each slider is the value that will be saved.
4. Attach disks (optional)
The volumes table starts empty. Add Volume lets you pick disks that already exist on the host you will choose. Drag rows to set boot order: the top of the list boots first. A short note on the form says priority 0 is the highest.
If you have not created a volume yet, finish this wizard without disks, or create the volume first under Storage and come back.
5. Check the review
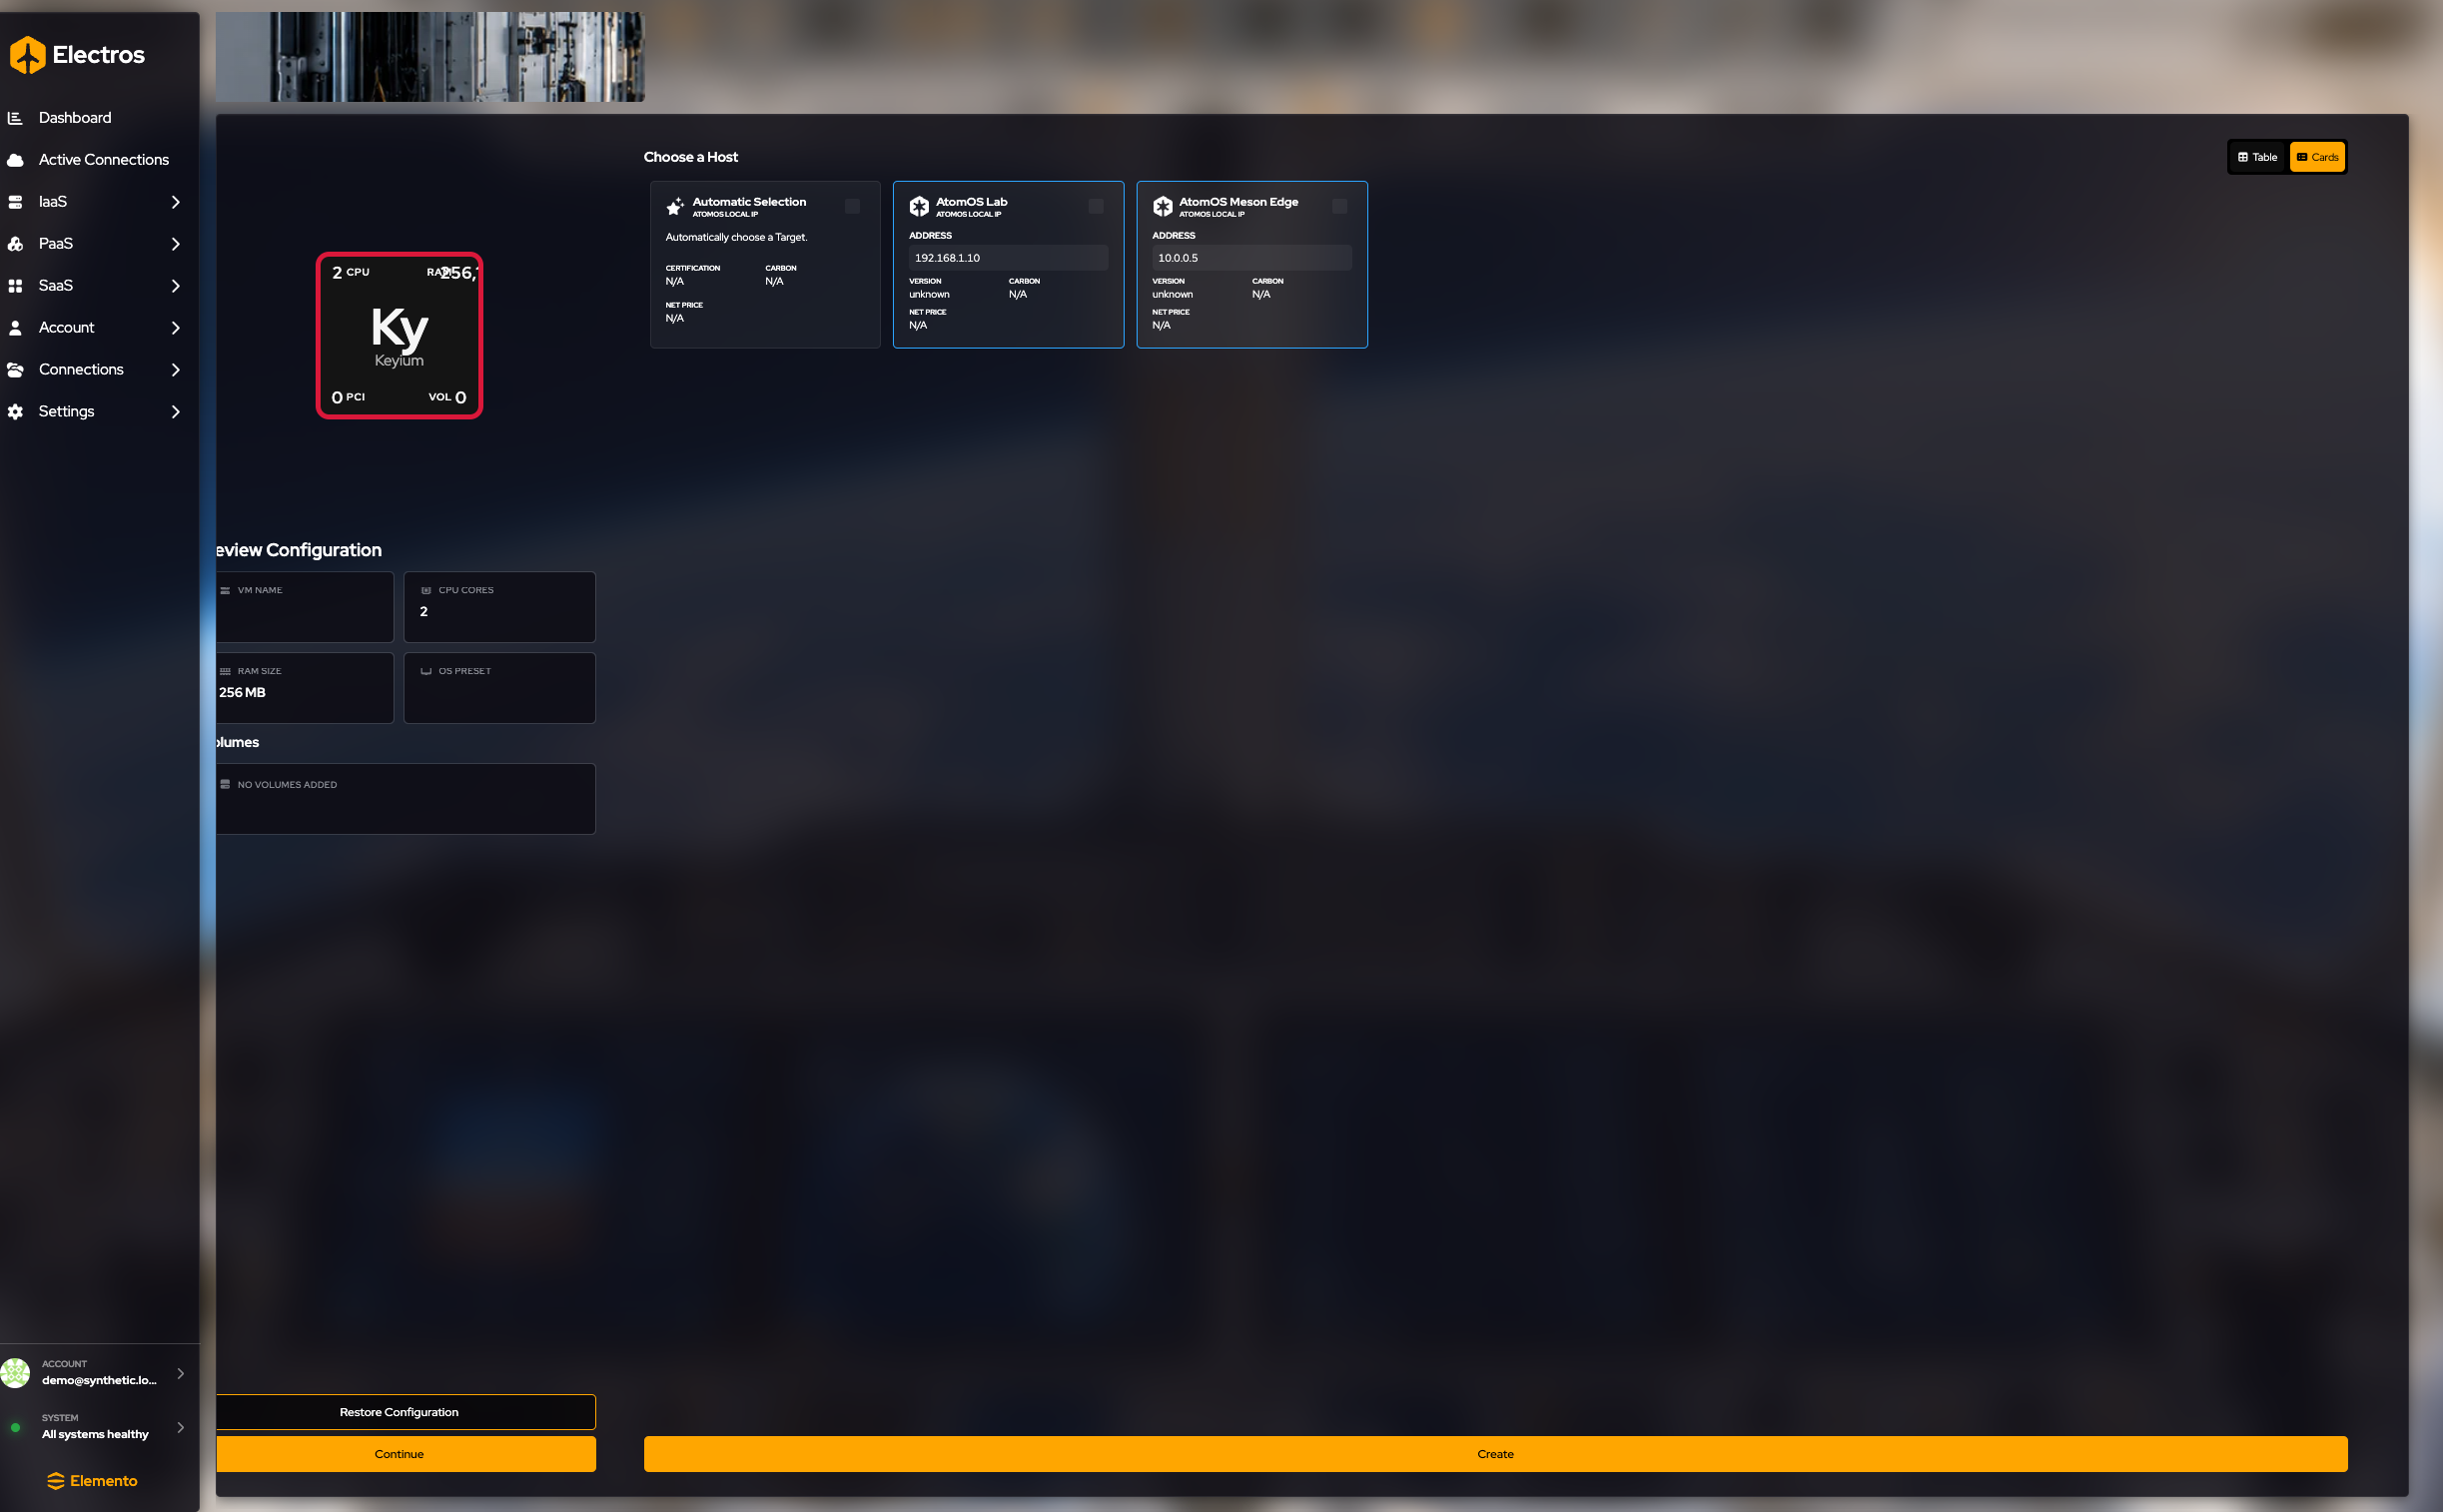
The panel on the right should match what you intend: name, 2 cores unless you changed it, 256 MB unless you changed it, the OS preset, and the volume list. Empty tiles mean that part is still unset.
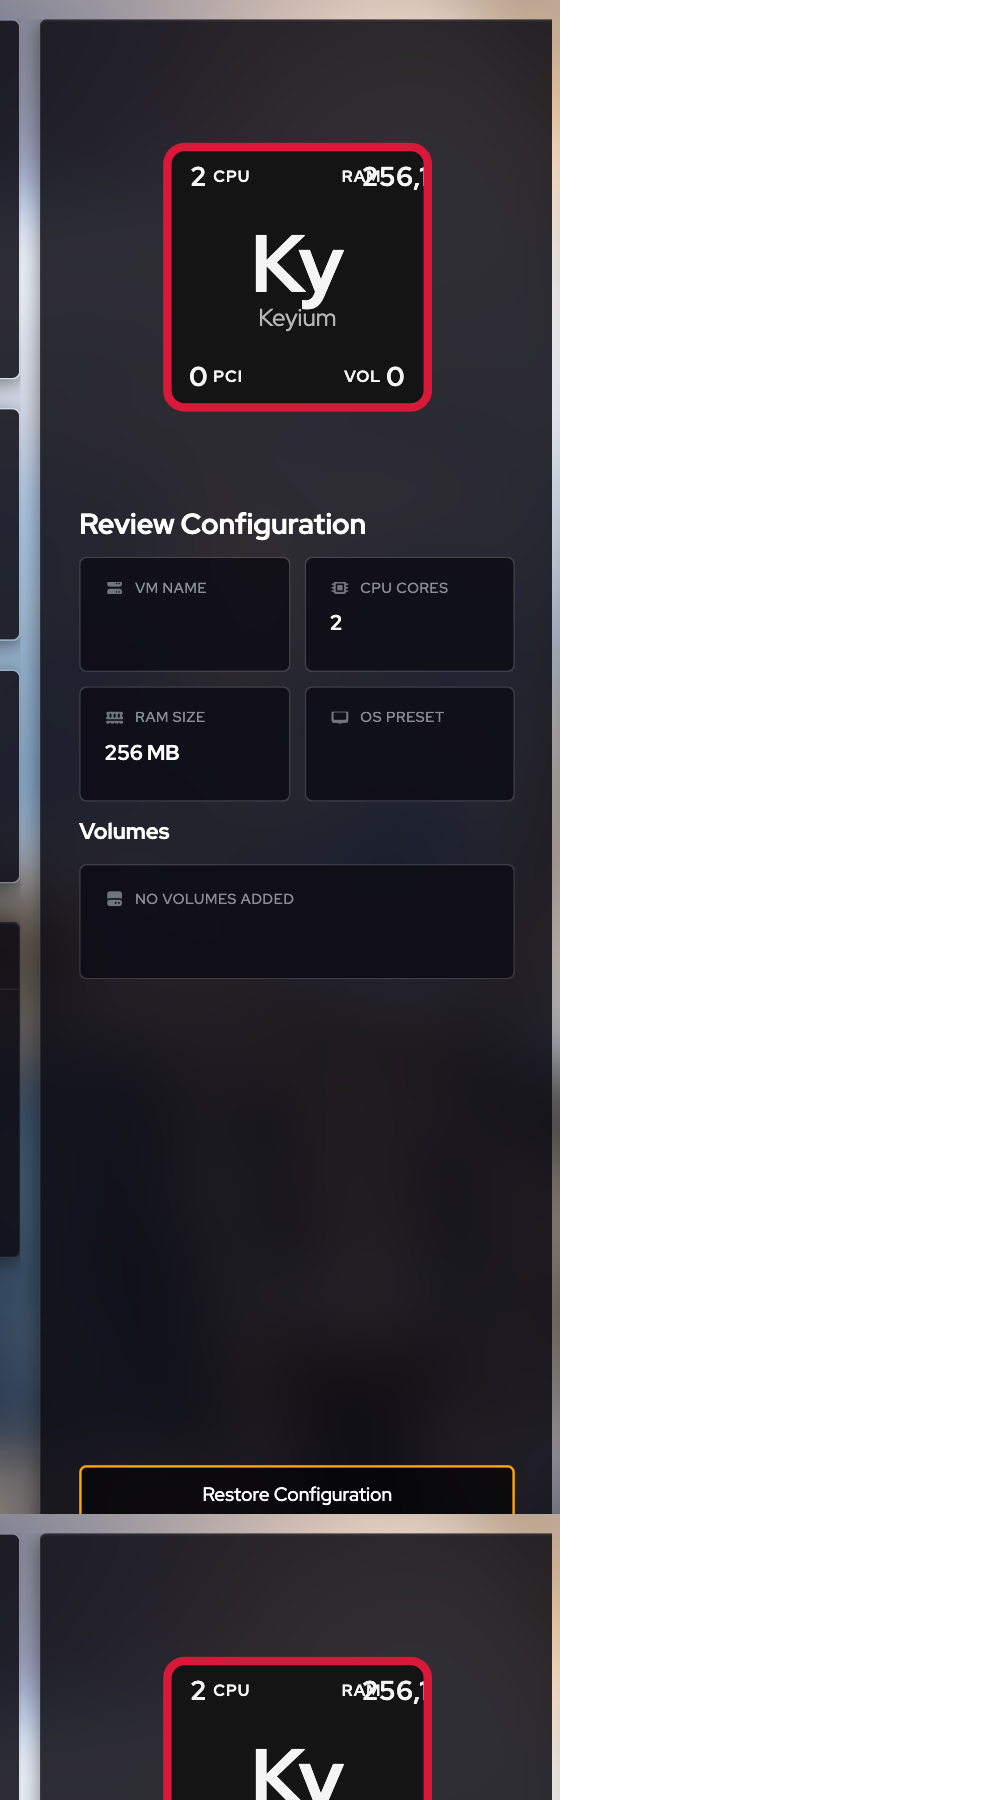
6. Continue, then choose a host
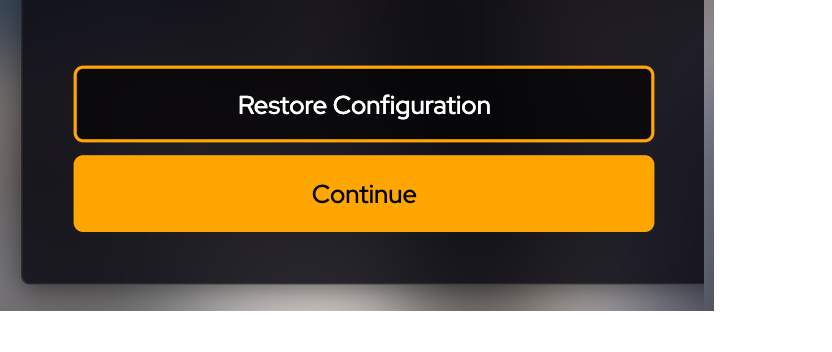
Restore Configuration throws away your edits. Continue does not create anything — it opens host selection.

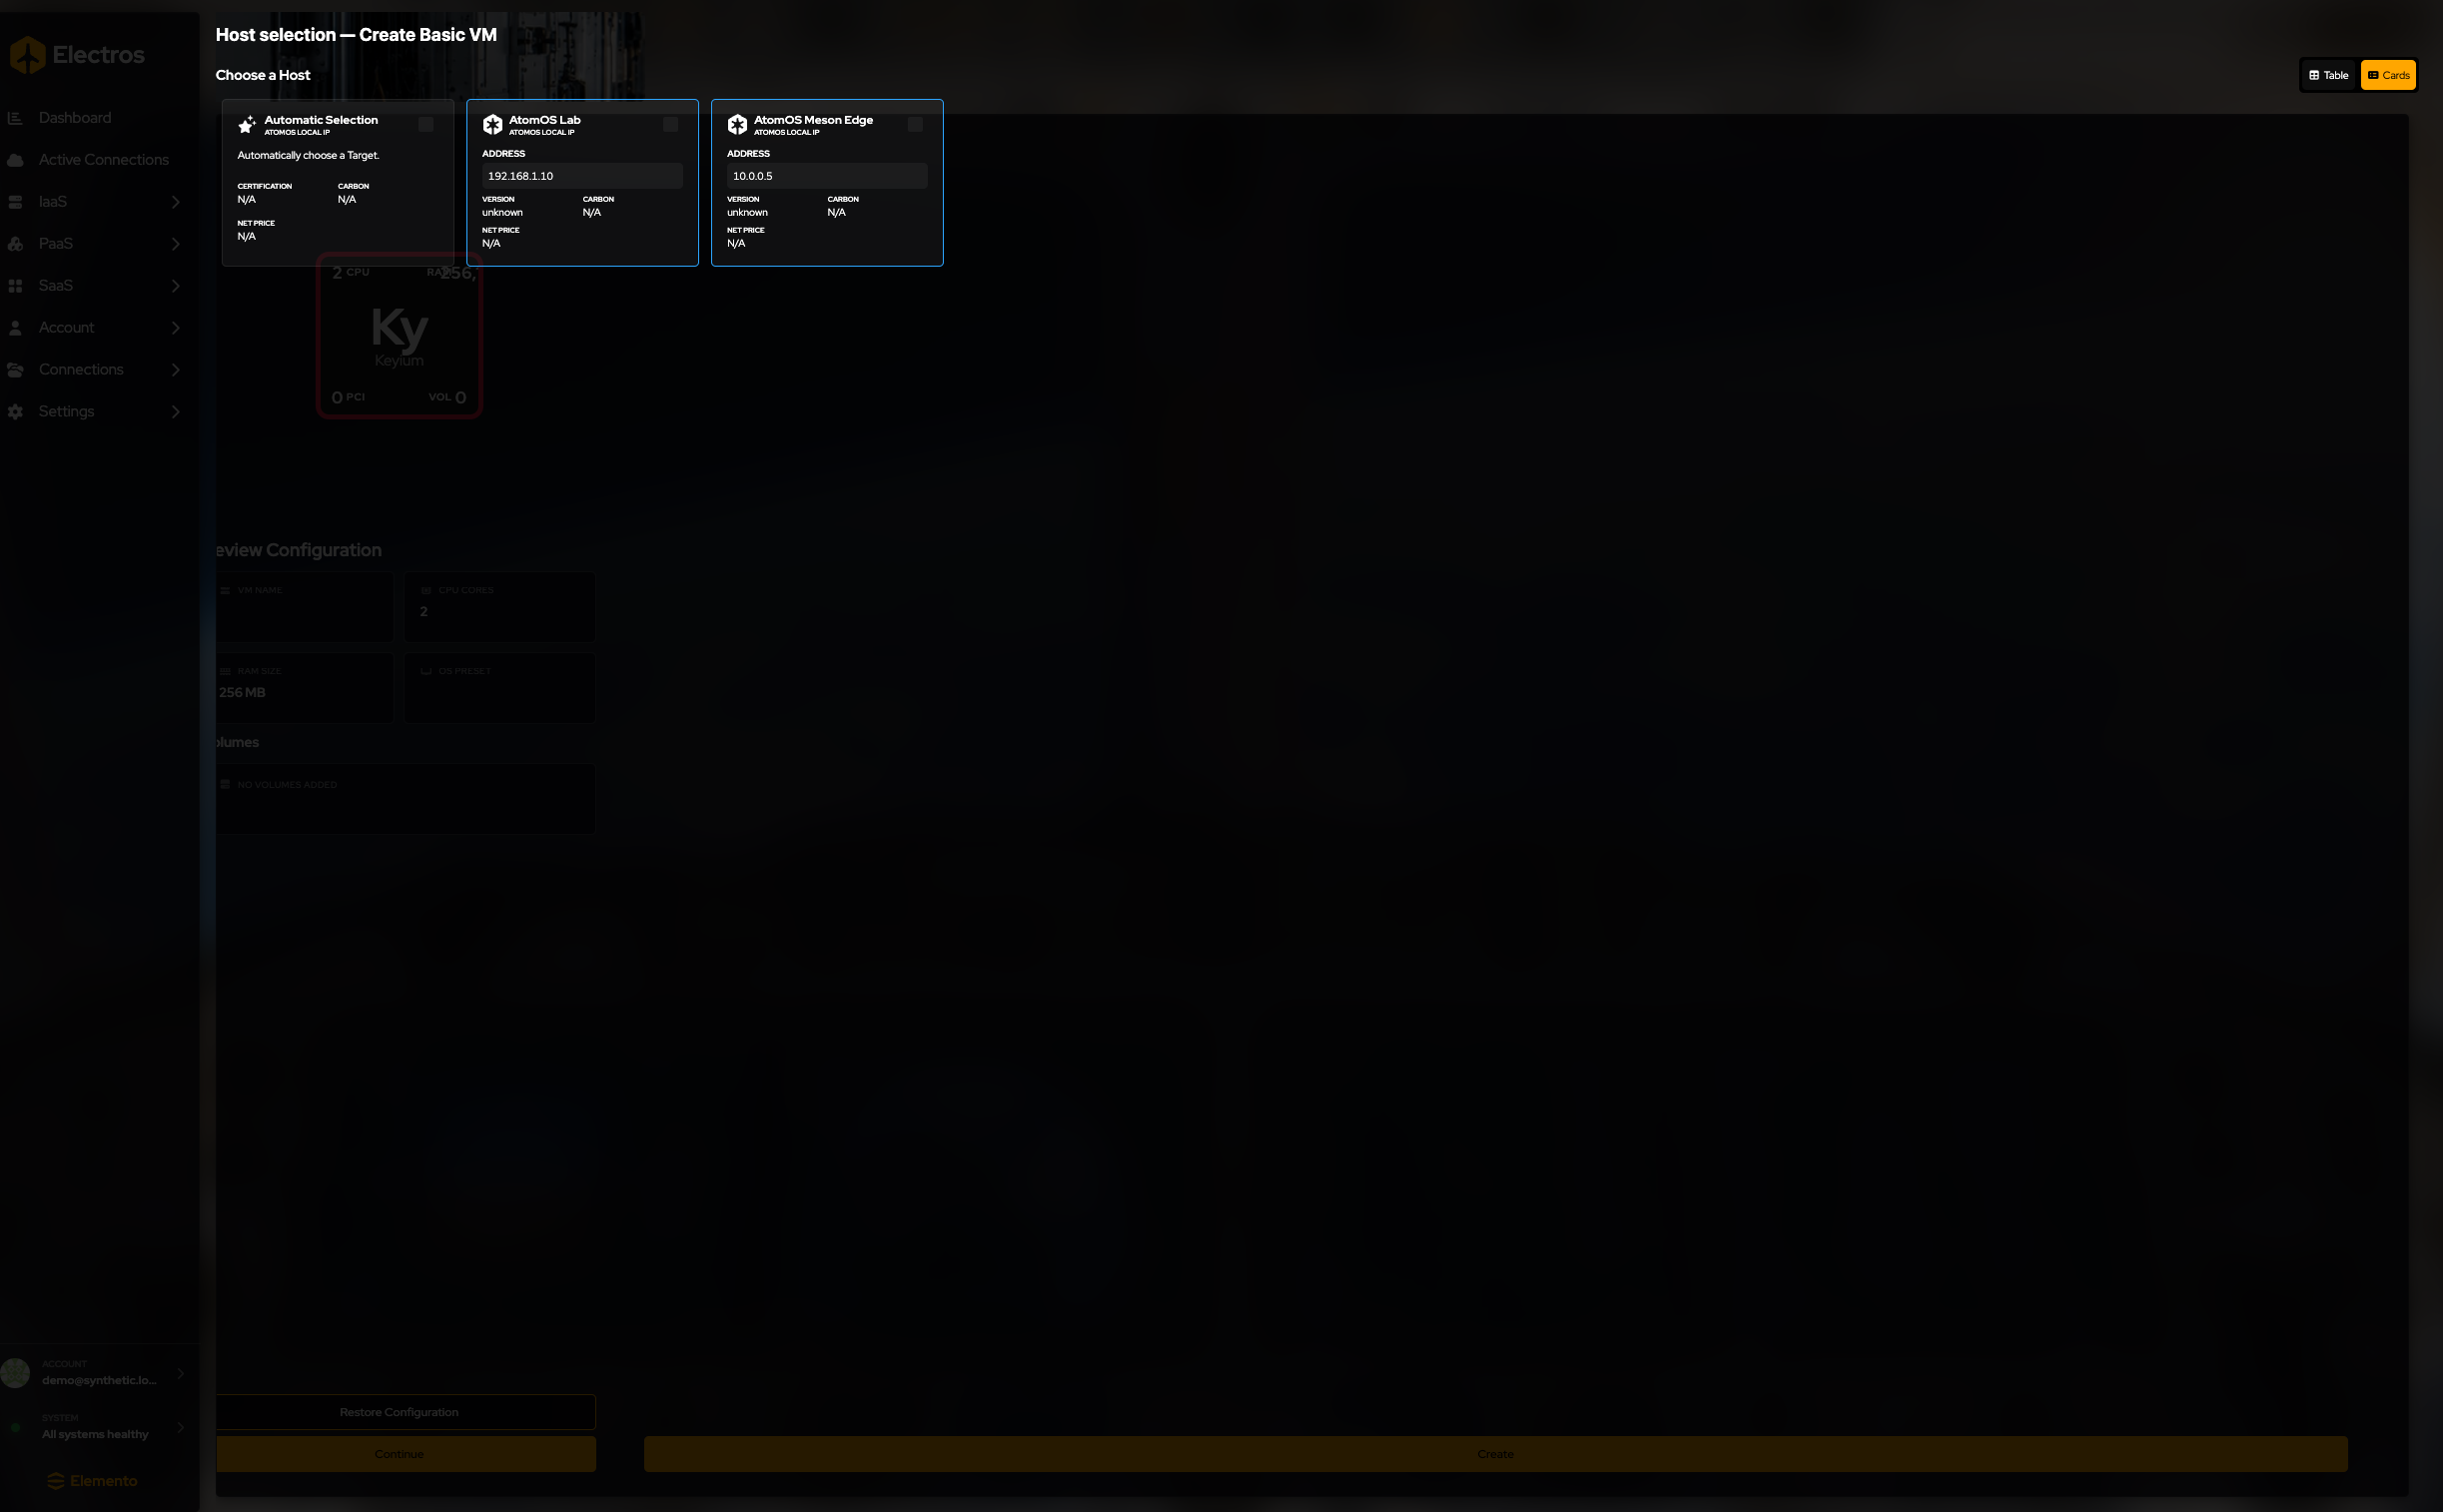
- Automatic Selection — Electros picks an eligible host.
- A named card — you pick the lab, edge box, or cloud account.
The selected card turns orange. Stop here if you are only learning the screen. Create is what actually starts the VM.
Login details (username, password, SSH key) appear only when Experimental mode is on. Do not put a private key in a shared screenshot; a public key is enough for the guest.
Basic create always requests an x86_64 machine.
Advanced VM
Where: Virtual Machines → Create Advanced VM
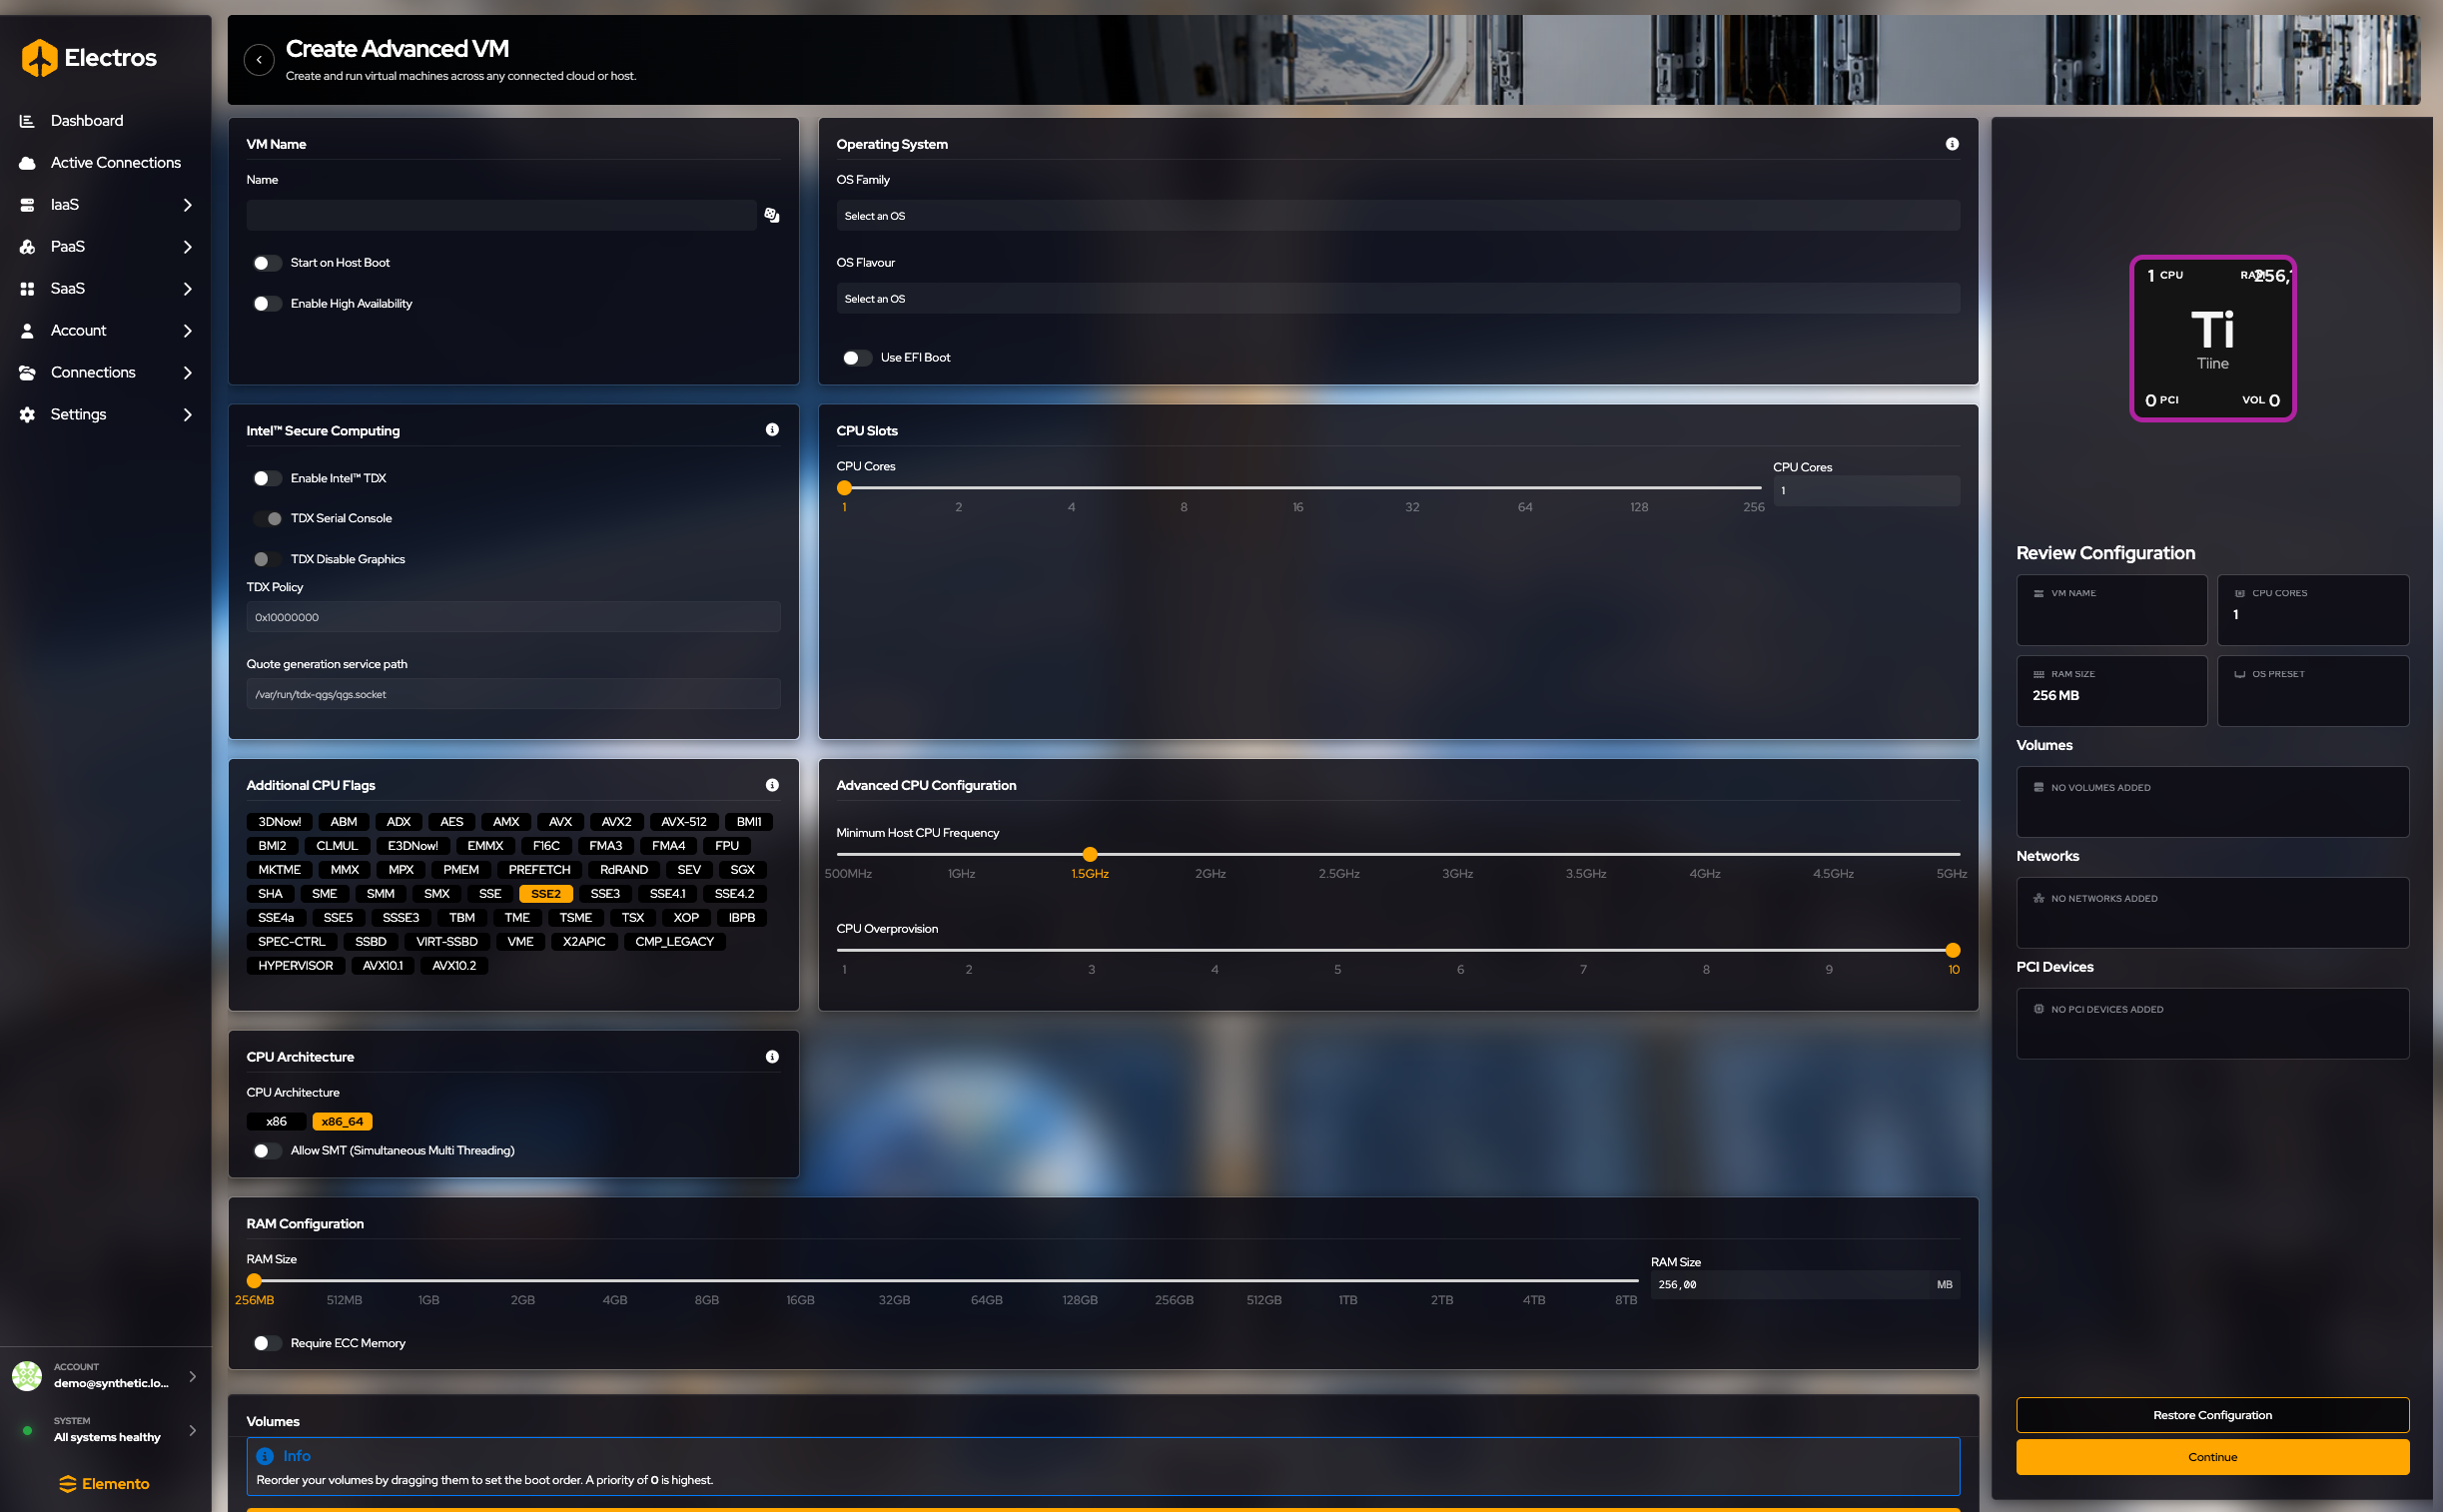
Start the same way as a basic VM: name, OS, CPU, memory, volumes, review, host. The extra sections are optional. Leave them alone unless you need them.
| Section | What to set | Leave it alone when |
|---|---|---|
| Start on host boot | Turn on if the VM should start whenever the host boots | You will start it yourself |
| High availability | Enable HA, then set a priority from 0 to 100 | You do not need failover |
| EFI boot | On for guests that require UEFI. Some OS flavours lock this for you | The preset already matches the guest |
| Intel TDX | Confidential VM. Serial console, graphics, policy, and the quote-socket path stay disabled until TDX is on | You are not using TDX hardware |
| CPU flags | Extra CPU features. SSE2 starts checked. Minimum frequency defaults to 1.5 GHz. Overprovisioning defaults to 10 | The host default CPU is fine |
| Architecture | Pick the CPU architecture the guest needs | x86_64 is already correct |
| SMT | Allow simultaneous multithreading | You want one thread per core |
| ECC memory | Require error-correcting RAM. Some OS presets lock this | Any memory is acceptable |
| Networks | Add Network, then choose the network, driver (auto if you are unsure), MAC (blank = auto), and VLAN tags if you use them | The VM does not need a NIC yet |
| PCI | Add PCI Device with vendor, device, and quantity. “Attach full PCI lane” is a separate switch | You are not passing through hardware |
Then Continue, pick a host, and stop before Create — same as the basic wizard.
VM from a blueprint
Where: Virtual Machines → Create VM from Blueprint
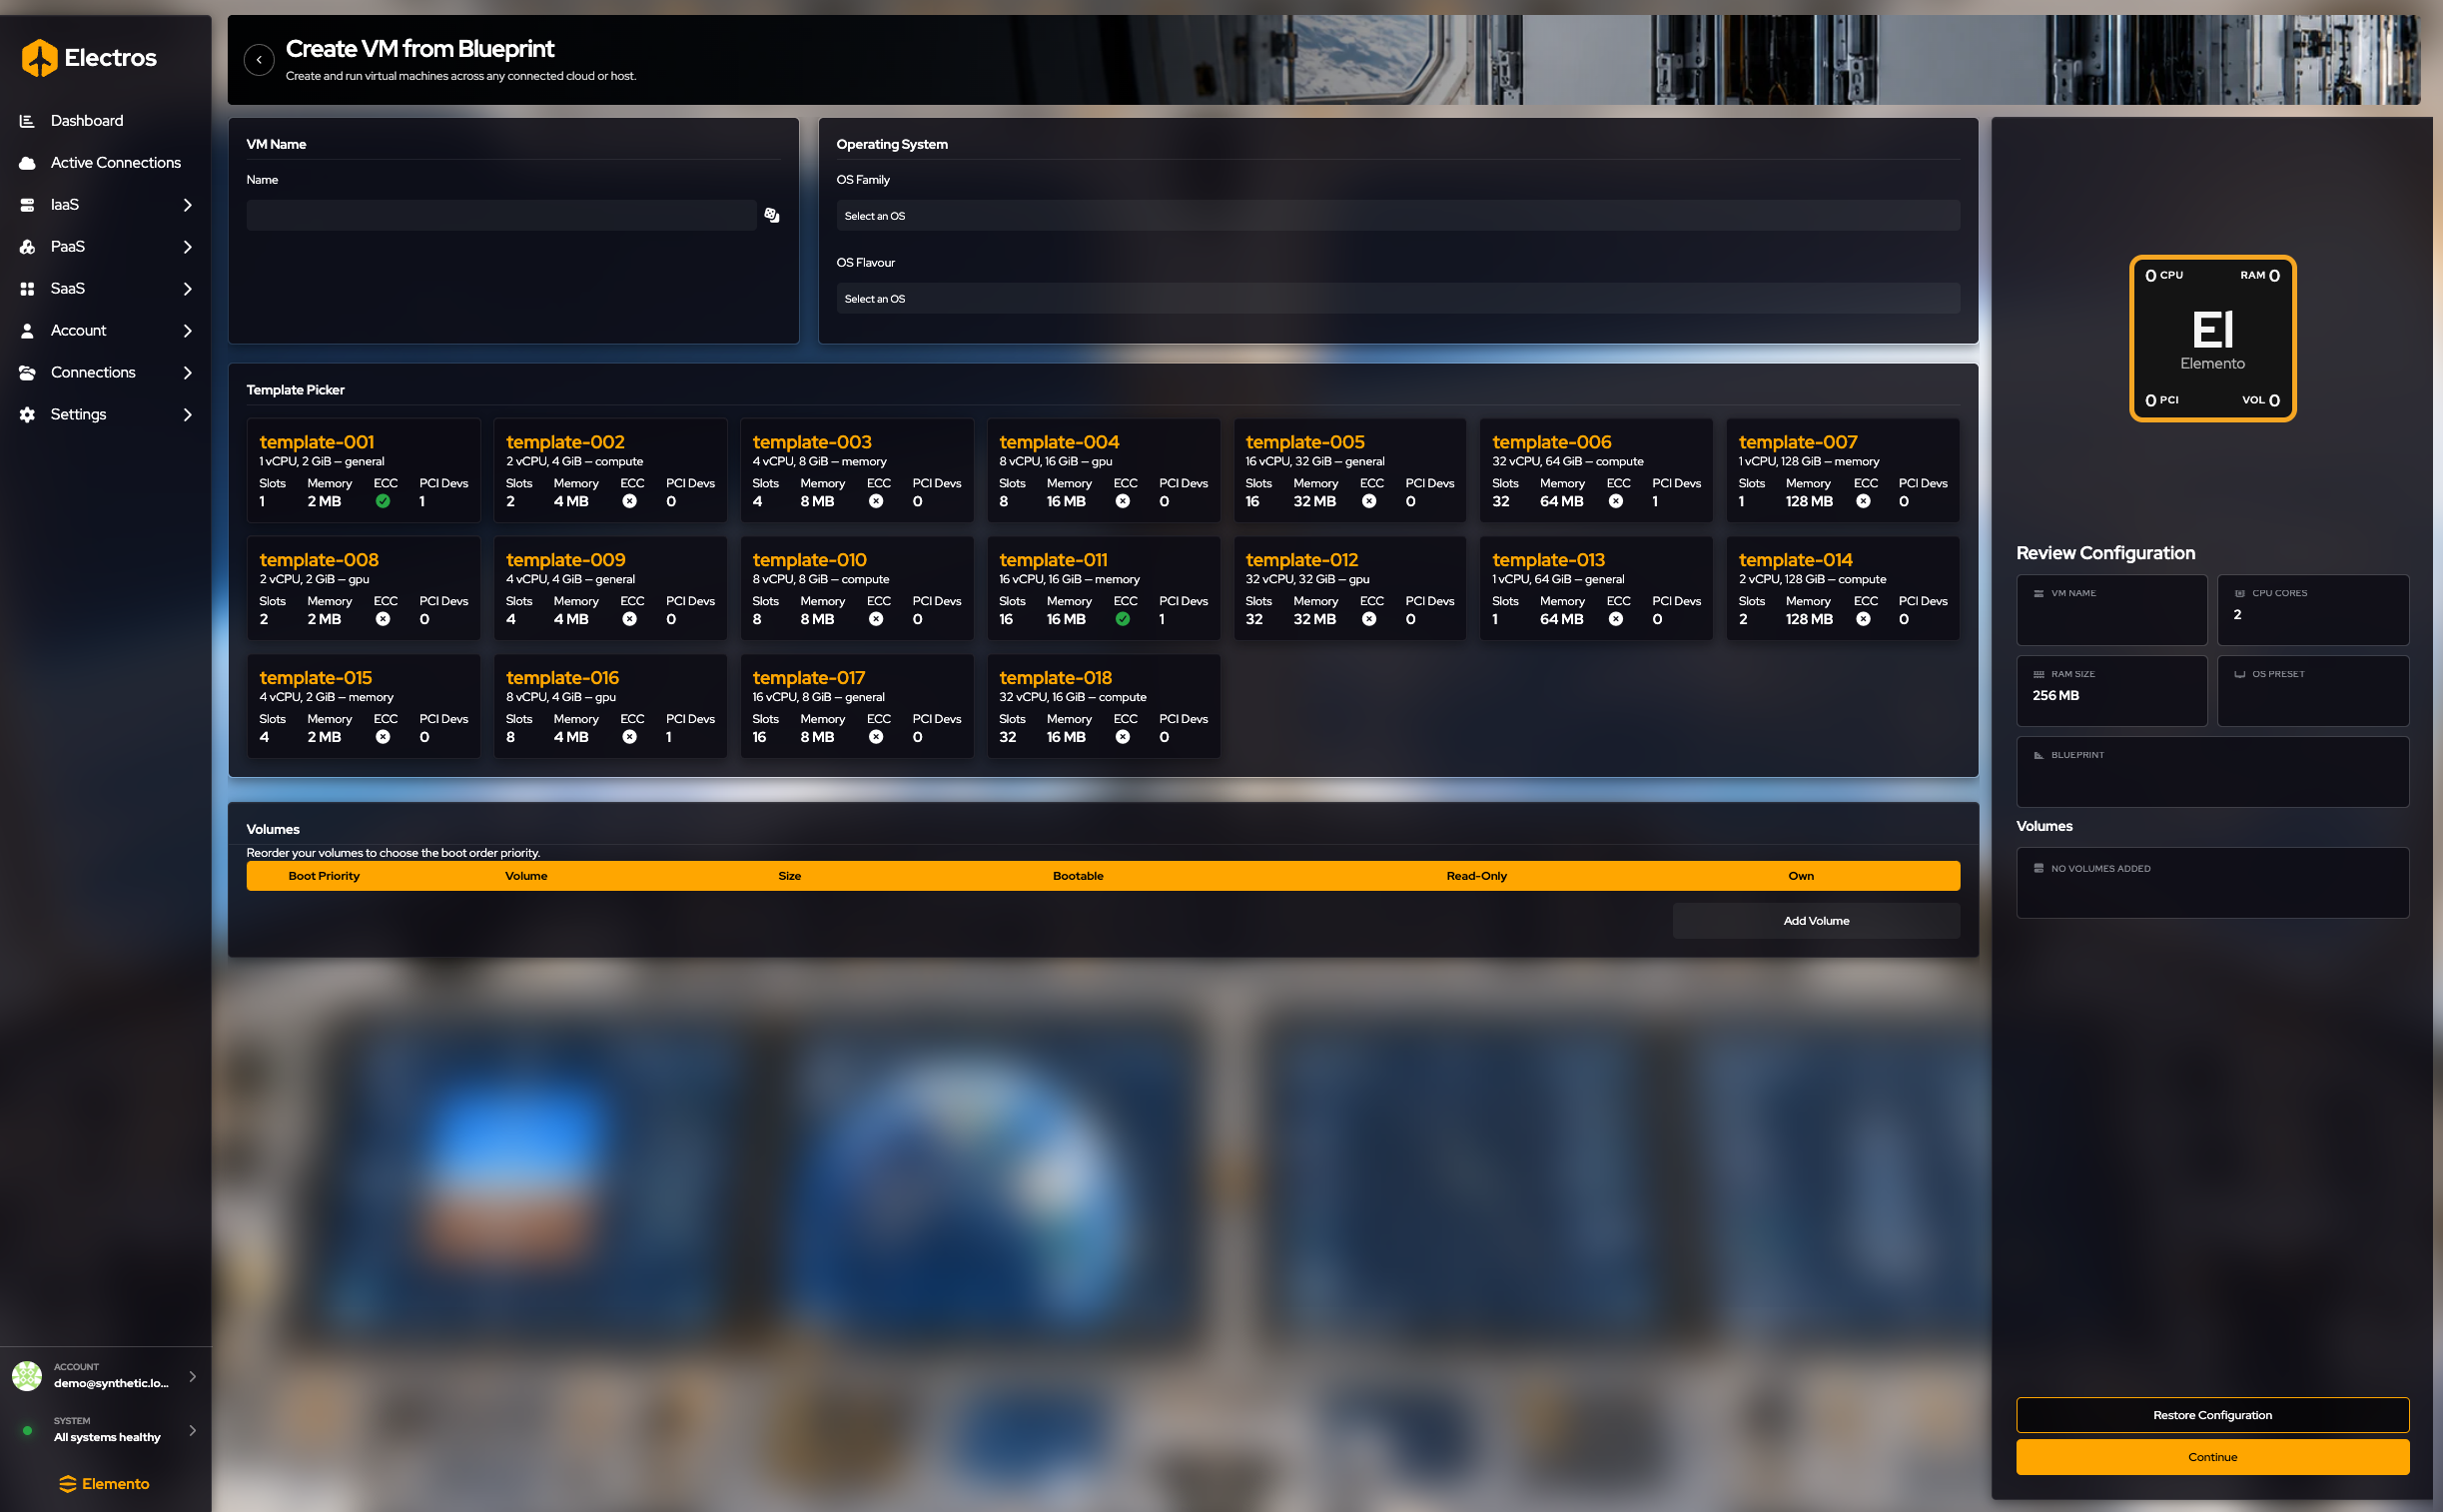
- Name the VM.
- Choose OS family and flavour.
- Select a template card. Each card shows how many CPU slots, how much memory, and whether ECC is required. You must pick one card.
- Optionally add volumes.
- Read the review (name, CPU, memory, OS, blueprint, volumes).
- Continue, choose a host, stop before Create.
Use this when your organisation already agreed on sizes (“small”, “gpu”, and so on) and you do not want to set cores and RAM by hand.
Edit an existing VM
Opening edit from a VM currently shows a short live-update notice. The form is not finished yet, so there is nothing to fill in. Change CPU, disks, and networks from the VM’s row actions on the list instead.
On the row
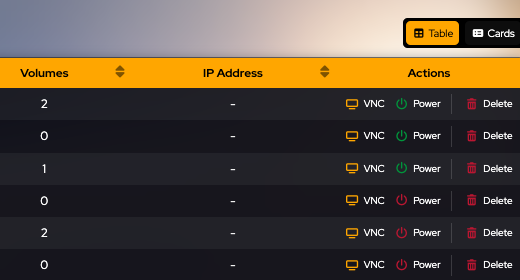
| Button | What it does |
|---|---|
| VNC | Opens the graphical console. The guest must be running |
| Power | Starts a stopped VM or shuts down a running one. Stopped is not deleted |
| Delete | Asks you to type the VM name. Cancel to keep it |
When you expand a row
Switch to Advanced, or open the row, for the detail cards.
VM Details shows the name, UUID, host, operating system, status, uptime, creation date, and whether high availability is on. From there:
| Button | When you see it | What it does |
|---|---|---|
| Boot or Shut Down | Always | Clean power change |
| Reboot | Always | Restarts the guest |
| Force Off | Always | Cuts power. Use it when Shut Down does not return |
| Migrate | The VM is on AtomOS | Moves it to another host |
| Backups | The VM is on AtomOS | List, take, or delete a backup |
| Attach QEMU Agent | The guest agent is missing | Attaches the agent so Electros can read guest details |
| Clone to AtomOS | The VM is not on AtomOS | Copies it onto an AtomOS host |
Remote Viewer embeds the VNC console in the row.
Attached Resources lists volumes, PCI devices, and networks. On an AtomOS host you also get port forwardings and port tunnels, each with a plus button to attach another. A VM that is not on AtomOS does not offer those port actions.